~ puchi rag doll how-to pt. 2: hair ~
yesterday, we finished the bald doll.
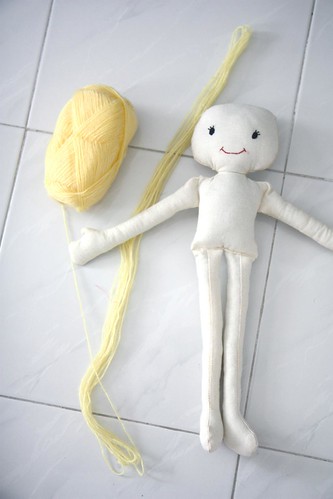
today, it’s the hair… i’m probably making it harder for myself by using thin acrylic yarn strands for the hair. but aina loves this yarn and she said the color was perfect. and dude, kids are the toughest client.it’s soooo hard to refuse their requests; and they ask for the weirdest things… (i.e. i want a wooden marionette, mommy!).
anyway, i digress…
after browsing and googling on how to do rag doll hair, i decided to do the yarn-sewing method. this way, aina can style the doll hair any way she wants… aina hasn’n been able to decide whether she wants the doll to have pigtails, braided hair, clipped front or just ponytail.
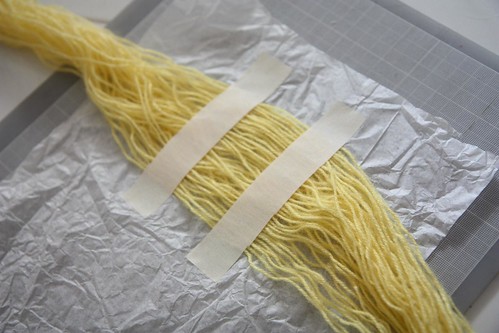
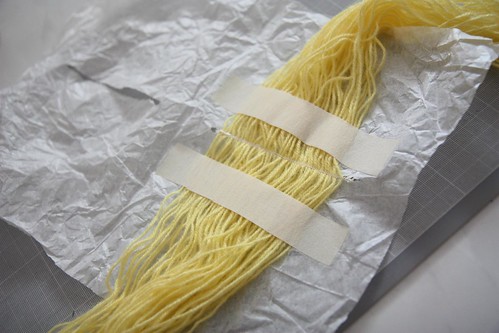
so, first, i needed the yarn, some masking tape and tissue papers (light crêpe paper). if you don’t have the tissue papers, you can use toilet paper, too.

aina wanted the doll to have a really long hair. so, i made a long bunch of yarn — twice the intended length of the hair. i placed the tissue paper right in the middle of the lengthened yarn. then, i spread the strands as evenly as i can on top of the tissue paper. using the masking tape, the strands are secured to the tissue paper, leaving the center part of the yarn open for sewing.
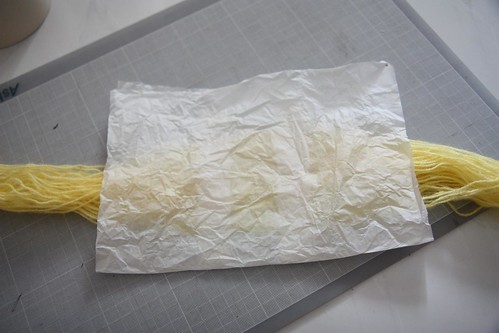
i placed another piece of tissue paper on top. or if you use a long pice of paper, just fold it on top of the taped yarn.
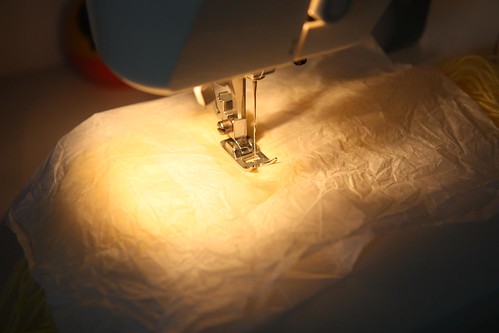
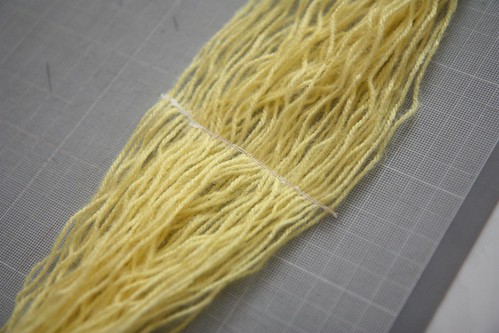
then sew the strands together. i had to use the smallest stitch settings on my machine because the yarn i use is so thin. and i went over it two to three times to make sure all the strands are sewn together. i’d suggest to use the closest color sewing thread to the yarn. it’ll help to camouflage the machine thread later.
once the sewing was done, i only had to rip the tissue paper apart and detach the yarn from the masking tape… and VIOLA, the first hairpiece is done! :D
then, place the hairpiece onto the head and secure it using the pins. based on aina’s drawing, the doll should be able to sport pigtails, so i attach the hairpiece vertically.

using the same yarn as the hair, i sew the hairpiece on to the head. make sure you cover the machine threads, especially if you use different thread color than the yarn. oh, when you start and end the sewing, it would be easier to leave a piece of yarn long enough to be a part of the hair to avoid knotting.

after you finish the first piece, stitch the hair around the head, starting where the ear of the doll should be. this should keep the hair in its place.
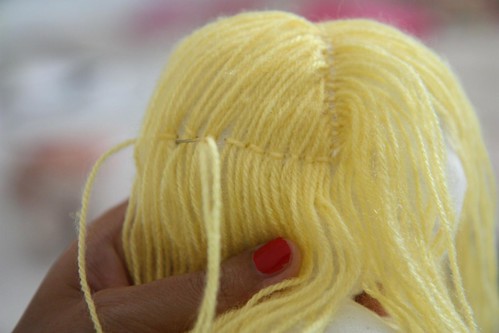
then, i made another hairpiece, about the same size as the first one. i placed it on top of first layer starting a little further down the forehead to cover the first layer and make the hair thicker. i shifted the center a little over so that i don’t have to sew right on top of the first layer’s stitches. it’s just easier that way.
you can make more hairpieces depending on how thick you want the hair to be. and if you want to have a side-parting, just sew another piece on the side of the forehead. aina wanted the doll to have center-part for the hair, so i only did two layers of hairpiece.
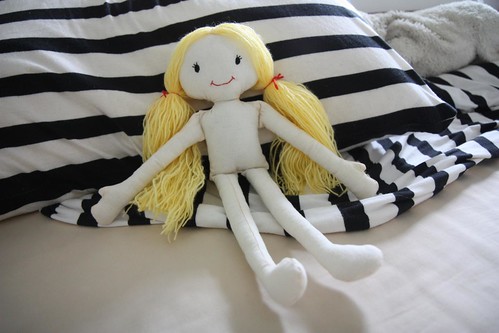
and it’s basically done!
aina named her puchi. puchi aina, she said.
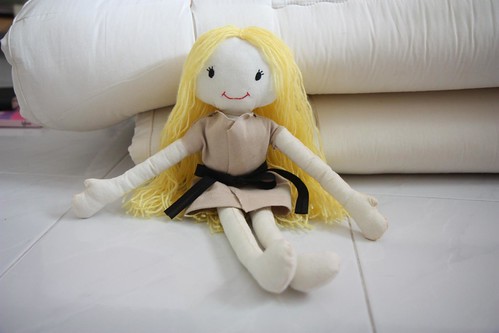

and i think it looks close enough to aina’s original design… with much thinner lips :)

we’ll be making her clothes in the next few days… aina has already drawn a few dresses and accessories for us to make.
~ comment (8) ~
wah bagus jadinya….
iya, lumayan jadinya… aina suka :D
ahhh super cute & creativeeeeee!!! must be very happy being aina! :)
thank youuuu! she’s still waiting for me to sew her some dresses tho. it’s cold to be naked :P
bener, mirip sama desain awalnya aina. bedanya cuma di bibirnya :D
tante thalia bisa bikin robot2an ga? buat nara sama adeknya (nyusahin) hihi…
haha, guenya ga mau bikin bibir kayak gitu… serem! :P
wah, blum pernah nyoba bikin robot tuh! abis anaknya ga pernah minta dibikinin robot sih… kapan2 mungkin mesti nyoba. eh, adiknya nara cowok juga ya?
lumayan gampang ya,Thal. Tapi pas bagian rambutnya nampak susah. Soalnya pake mesin jait. Ini yang bikin seru karna Aina yang bikin desainnya. Kereeeen!
wah kalo ga punya mesin jait, mending pake cara lain kali ya? misalnya pake yarn yang tebel trus jahit satu2 ke kepala. kalo tebel sih mestinya ga terlalu ribet. atau pake felt.