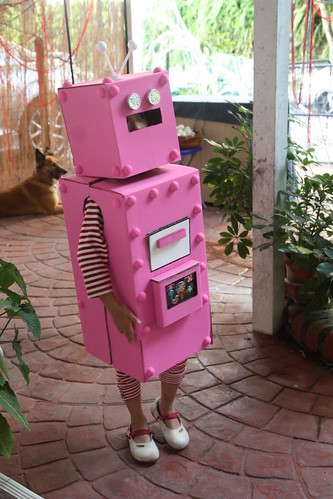
~ halloween prep: the pink robot ~

sorry for the delay… it’s been crazy hectic and i kept forgetting to to write this how-to entry.
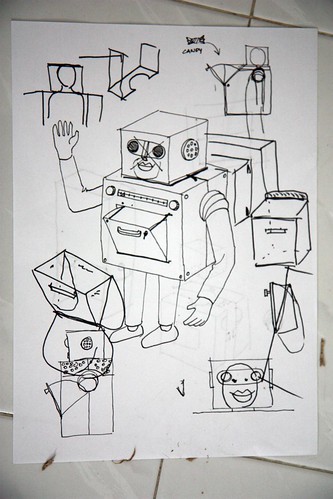
aina has been asking to be a robot for halloween back in March. and she was very specific about the color. this is her design:

complete with flowers and thick lips, which will be quite hard to incorporate into a robot. so ari and i had to refine the design… sort of.
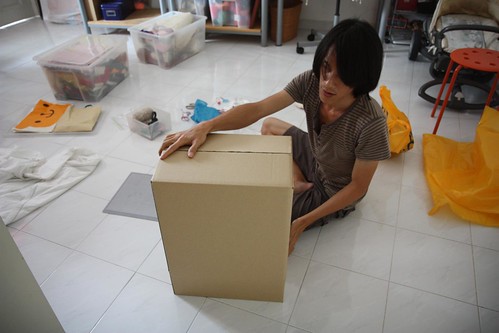
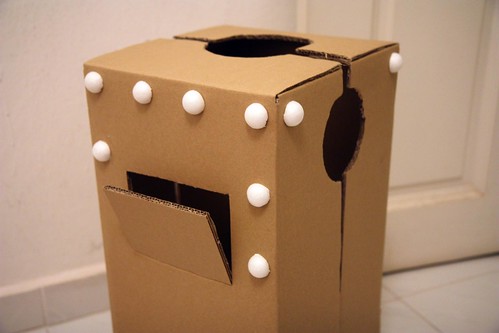
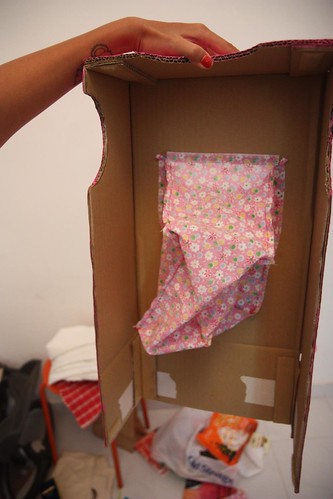
so we started with a cardboard box. used box is okay, as long as it doesn’t stink :)
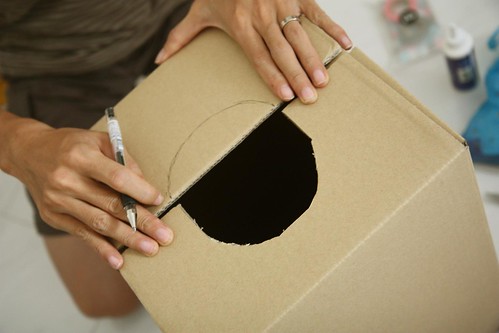
first, we cut the box in half and made it thinner so that it fits aina. we also made holes for the neck and arms.

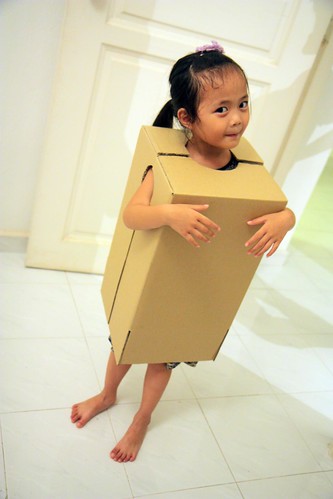
then, we stick the velcro on the shoulder and side seams. that way, aina can wear the box and it would be easy for us to take it on and off her.

once it’s all done, we cut out an opening for the candy compartment.

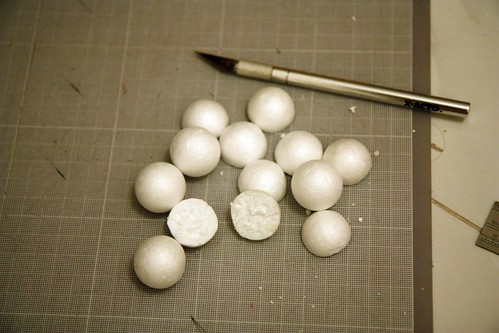
to make the steel rivet look, we cut styrofoam balls in half, stick them on to the cardboard box and painted it with pink color. we could use spray paint, but it’s just cleaner and more kids-friendly using acrylic paint and brush. that way, aina can help sticking and painting.
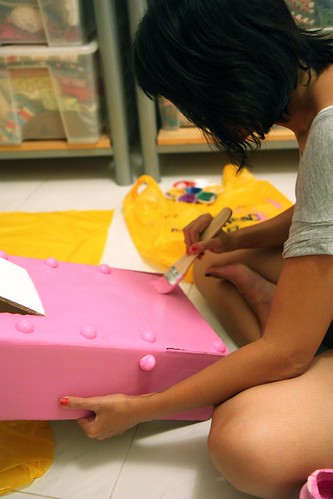
while waiting for the paint to dry, we sew the candy pocket. aina chose a pink flowery fabric (which is an obvious choice coming from her) for the pocket. after the pink paint dried, we glued the pocket opening on to the flap.
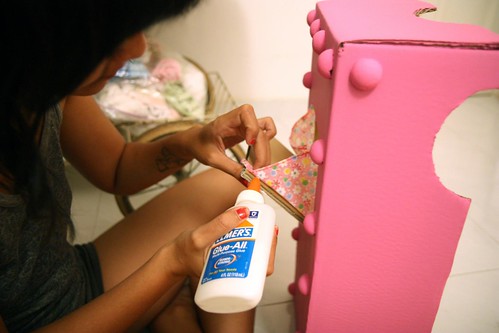
we also made a small ledge, placed underneath the pocket.
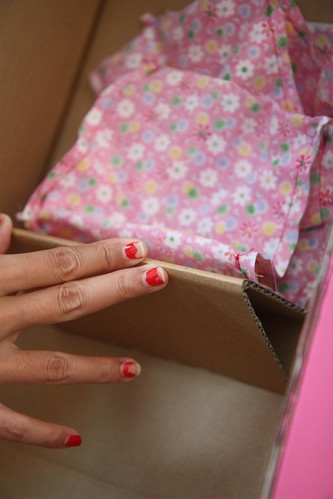
pardon the peely nail polish! *how embarassing!*
the ledge served as two things: first as a table so that the weight of the candy won’t pull the fabric off the cardboard, just in case the glue isn’t strong enough. second, the ledge will lean over aina’s tummy and keep the robot costume from leaning forward when worn.
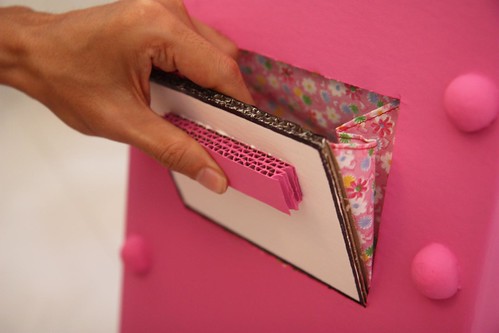
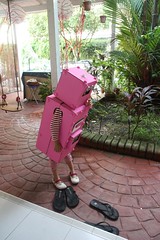
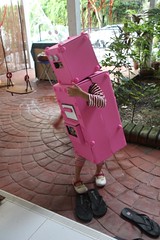
basically, this is the candy compartment look like after it’s all done:
we then found that we still have some styrofoam balls left over, so we decorated the head with “steel rivet”.

the eyes were made out of small round candle used case… you know the small, scented one? the cases are made out of thin and bendable aluminum sheet and they’re easy to work with.
the antennae was made out of straws, balloon holder and more styrofoam balls.

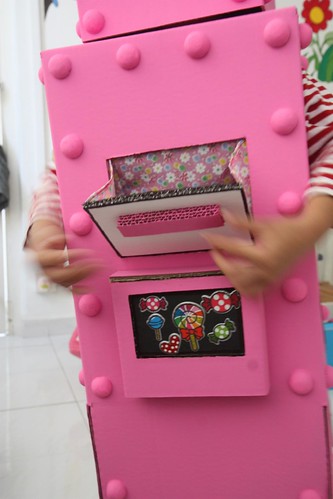
it turns out that people looooved the pink robot… and the candy compartment was a big hit. fellow trick-or-treat kids wanted to play with the pink robot. dining people from the restaurant nearby ran over to take pictures of aina in her costume. and whenever aina open the compartment to put in the candy, the people would squeel and go, “oooh, so cooool! here’s more candy for you!”
so, it was a big success :) aina got a lot of candies, too!
and here is a silly video of the pink robot, being giddy before the trick-or-treat started :)
~ comment (8) ~
mbak thalia, aku boleh ijin nyontek desain dan cara bikin badan robot nya gak? kebetulan di kantor mau ada acara dan temanya klop, hehe,, makasih banyak mbak :)
boleh dooooong! ntar kalo udah jadi, foto2 yaaa! pengen liaaaat! :D
Numpang komen ya..
Kereen banget!
Sampe melongo gitu bacanya trus bikinannya rapi banget. I am envious to parents like you two who put all efforts to kid costumes:)
makasiii! kalo soal kostum2an, obsesi bapak ibunya juga sih sebenernya, hihihi.
wah Aina pasti senang sekali. lucu sekali, pink is also eye catching color, especially for children.
iyaaa, seneng sekaliiii! dan bangga gitu makenya. ortunya jadi ikutan seneng deh, hihihi.